
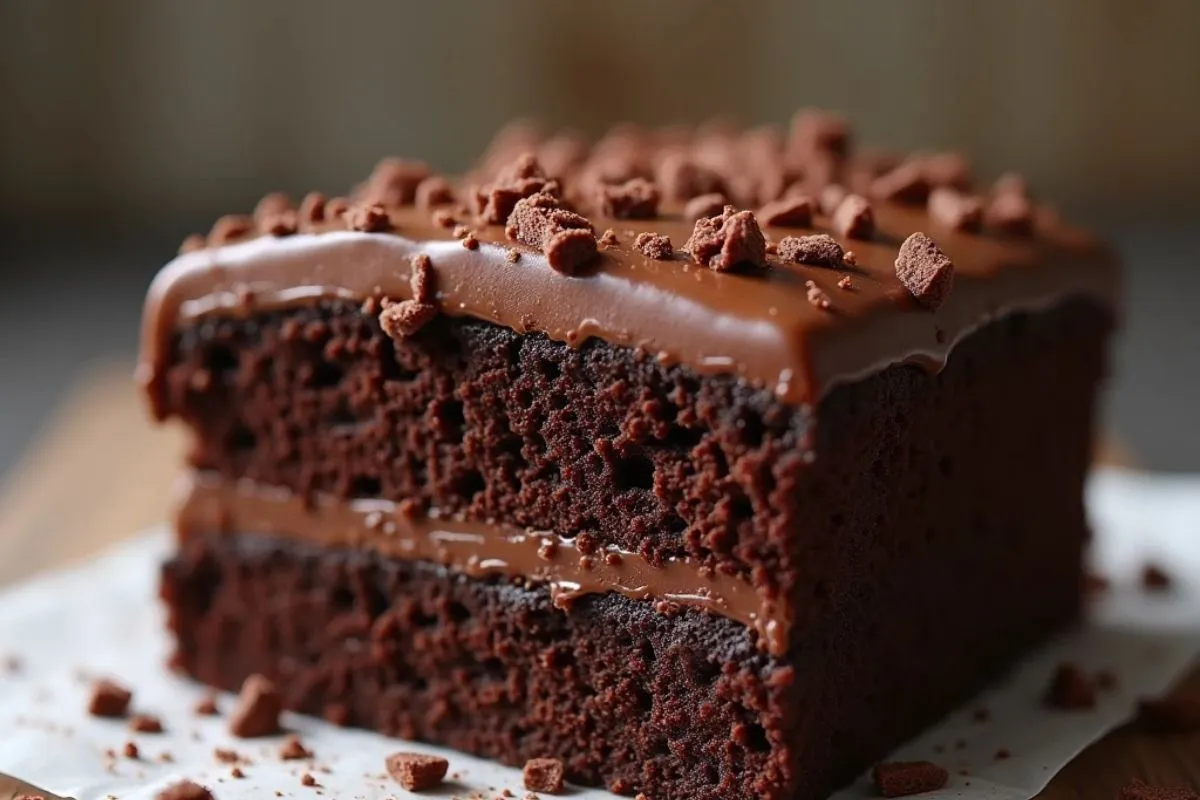
There’s something about a slice of rich, moist chocolate cake that makes any occasion feel special. Whether you’re celebrating a birthday, treating yourself after a long day, or simply indulging in a well-deserved dessert, the perfect chocolate cake never disappoints. But how do you make a chocolate cake that’s truly unforgettable?
This article will guide you step by step in making the best chocolate cake from scratch. You’ll discover the key ingredients that make it rich and moist, the baking techniques that ensure the perfect texture, and the secret ingredient that elevates its flavor. By the end, you’ll have a foolproof recipe that will impress your family and friends.
Let’s dive into the details, starting with the essential ingredients and tools you need to get started.
Table of Contents

Ingredients and Equipment for the Best Chocolate Cake
A truly exceptional chocolate cake starts with high-quality ingredients and the proper tools. By carefully selecting each component, you can create a cake that is irresistibly rich, moist, and full of deep chocolate flavor.
Key Ingredients for a Moist and Flavorful Chocolate Cake
Each ingredient plays a significant role in achieving the perfect balance of taste and texture. Here’s what you’ll need:
| Ingredient | Purpose |
|---|---|
| All-Purpose Flour (2 cups) | Provides structure and stability. |
| Granulated Sugar (2 cups) | Adds sweetness and helps retain moisture. |
| Unsweetened Cocoa Powder (¾ cup) | Delivers an intense chocolate taste. |
| Baking Powder (2 tsp) & Baking Soda (1½ tsp) | Ensures the cake rises properly. |
| Salt (1 tsp) | Balances and enhances the overall flavor. |
| Buttermilk (1 cup) | Keeps the cake soft and adds a slight tang. |
| Vegetable Oil (½ cup) | Maintains moisture and tenderness. |
| Large Eggs (2) | Binds the ingredients together. |
| Vanilla Extract (2 tsp) | Enhances the chocolate’s depth of flavor. |
| Hot Coffee (1 cup) | Intensifies the chocolate taste without overpowering it. |
Why Add Hot Coffee?
Using hot coffee may seem like an unusual step, but it enhances the cocoa powder’s richness, creating a deeper and more complex chocolate flavor.
Essential Tools for Baking Success
To achieve the best results, ensure you have these baking essentials:
- Large Bowls: Needed to mix the wet and dry ingredients separately.
- Whisk & Spatula: A whisk helps evenly distribute dry ingredients, while a spatula ensures no batter is wasted.
- Measuring Tools: Accurate ingredient quantities are crucial for a well-balanced cake.
- Two 9-Inch Round Cake Pans: The ideal size for even baking.
- Baking Paper: Helps prevent the cake from sticking to the pans.
- Wire Rack: Helps the cake cool properly and prevents sogginess.
Now that you have everything you need, it’s time to move on to the next step—mixing and baking your cake batter to perfection.
Step-by-Step Guide to Making the Perfect Chocolate Cake Batter
With your ingredients and tools ready, it’s time to create the batter. This stage is key to achieving a soft, moist, and rich chocolate cake. Follow these instructions carefully to get the best possible outcome.
Preparing the Batter
1. Get the Oven and Pans Ready
Set your oven to 350°F (175°C) to preheat while you gather everything else. Grease two 9-inch round cake pans and line them with baking paper to prevent sticking and make removal effortless after baking.
2. Mix the Dry Ingredients
In a large mixing bowl, combine the following:
- 2 cups all-purpose flour
- 2 cups granulated sugar
- ¾ cup unsweetened cocoa powder
- 2 teaspoons baking powder
- 1½ teaspoons baking soda
- 1 teaspoon salt
Use a whisk to mix everything thoroughly, ensuring that the dry ingredients are evenly blended, which helps distribute the cocoa powder and leavening agents properly.
3. Whisk Together the Wet Ingredients
In a separate bowl, beat together:
- 1 cup buttermilk
- ½ cup vegetable oil
- 2 large eggs
- 2 teaspoons vanilla extract
Stir well until the mixture is smooth, making sure the eggs are completely incorporated.
4. Combine the Wet and Dry Mixtures
Gradually add the wet mixture to the bowl containing the dry ingredients. Stir gently using a whisk or an electric mixer on low speed, blending until just combined. Overmixing should be avoided, as it can result in a dense texture instead of a light and tender crumb.
5. Add the Secret Ingredient: Hot Coffee
Carefully pour in 1 cup of hot coffee, stirring until the batter becomes smooth and fully incorporated. The batter will be thin, which is expected—hot liquid helps intensify the chocolate flavor, making the cake rich and deeply indulgent.
Baking the Cake
1. Pour the Batter into the Pans
Evenly distribute the batter between the two cake pans you prepared earlier. Lightly tap each pan on the counter to eliminate air bubbles and create a more uniform texture.
2. Bake Until Perfectly Done
Place the pans inside the preheated oven and allow them to bake for 30 to 35 minutes. To check for doneness, insert a toothpick into the center—if it comes out clean, the cake is ready. Try not to open the oven door too early, as sudden temperature shifts can affect the cake’s ability to rise properly.
3. Let the Cakes Cool
Once baking is complete, leave the cakes in their pans for 10 minutes before transferring them to a wire rack. Allow them to cool fully before adding frosting.
Now that your cakes are baked to perfection, it’s time to prepare a smooth and creamy chocolate frosting.
How to Make the Perfect Chocolate Frosting
A chocolate cake isn’t complete without a rich and creamy frosting. The right frosting should be smooth, spreadable, and full of deep chocolate flavor. In this section, you’ll learn how to make a decadent chocolate frosting that perfectly complements your moist chocolate cake.
Ingredients for the Frosting
To achieve a silky and flavorful chocolate frosting, gather the following ingredients:
| Ingredient | Purpose |
|---|---|
| 1 cup (2 sticks) unsalted butter, softened | Creates a creamy and smooth texture. |
| ¾ cup unsweetened cocoa powder | Provides a rich, chocolatey taste. |
| 3 cups powdered sugar | Sweetens and thickens the frosting. |
| ½ cup heavy cream (or milk) | Helps achieve the perfect consistency. |
| 2 teaspoons vanilla extract | Enhances the chocolate flavor. |
| A small amount of salt | Helps balance the sweetness and enhances the depth of flavor. |
Step-by-Step Instructions for Making the Frosting
1. Whip the Butter Until Creamy
In a large mixing bowl, use a hand mixer or stand mixer to beat the softened butter on medium speed for about 2 minutes until it becomes light and fluffy.
2. Add the Cocoa Powder
Gradually sift in the unsweetened cocoa powder and mix until it is fully combined with the butter. This step ensures a smooth consistency and prevents lumps in the frosting.
3. Incorporate the Powdered Sugar and Cream
Alternate between adding the powdered sugar and the heavy cream (or milk). Start by adding one cup of powdered sugar, mix on low speed, then add a few tablespoons of cream. Repeat this process until all the sugar and cream have been incorporated.
4. Add the Vanilla and Salt
Mix in the vanilla extract and a small amount of salt to round out the sweetness and bring out the richness of the chocolate. If the consistency is too thick, gradually add more cream, one tablespoon at a time, until it becomes smooth and spreadable.
5. Beat Until Light and Fluffy
Turn the mixer to high speed and beat for another 2-3 minutes, until the frosting is light, fluffy, and easy to spread.
Tips for the Best Chocolate Frosting
- Choose Quality Cocoa Powder: Using a premium cocoa powder enhances the chocolate flavor, making the frosting richer and more indulgent.
- Adjust the Sweetness: If you prefer a less sweet frosting, reduce the powdered sugar slightly and add a bit more cocoa powder.
- For Extra Shine: A tablespoon of melted chocolate can add a glossy finish to your frosting.
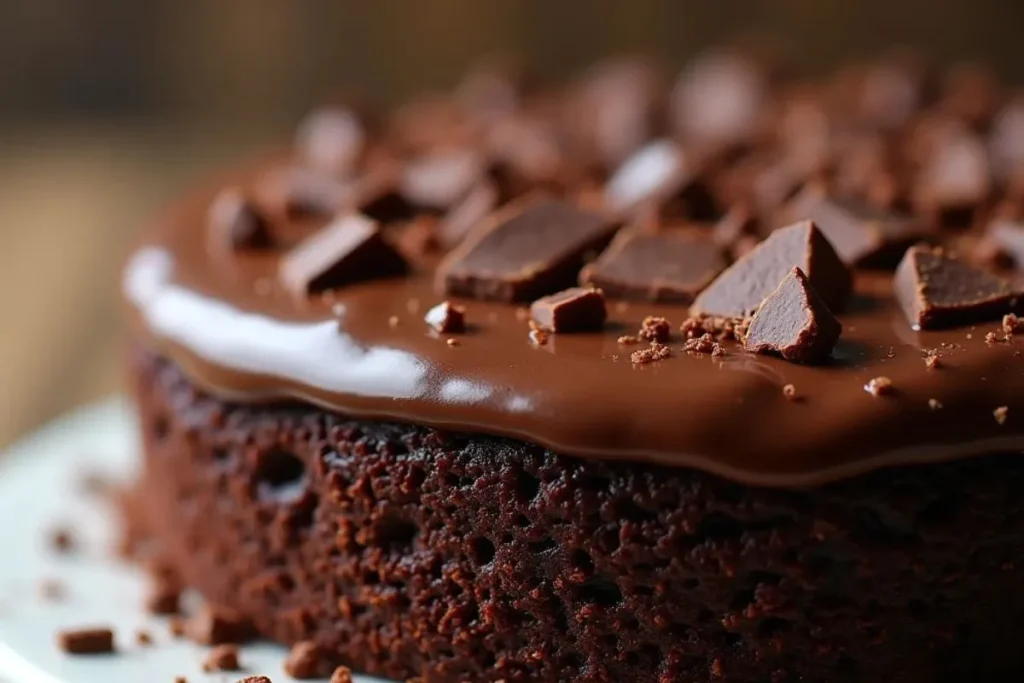
Now that your frosting is ready, it’s time to assemble and decorate your chocolate cake!
Assembling and Decorating Your Chocolate Cake Like a Pro
Now that your cake layers are baked and your frosting is perfectly smooth, it’s time to bring everything together. The way you assemble and decorate your cake can make all the difference, ensuring a stunning presentation and a well-balanced flavor in every bite.
Step 1: Prepare the Cake Layers
Before assembling, make sure your cake layers are completely cooled. If they’re still warm, the frosting may melt and become runny.
Level the Cake (If Needed)
- If your cake layers have domed tops, use a serrated knife to gently trim the tops to create flat, even layers.
- This helps ensure a stable cake and makes layering easier.
Chill the Cake Layers (Optional)
- If your cake is delicate or crumbly, refrigerate the layers for 15-20 minutes before frosting.
- Chilled cake layers are firmer, making them easier to handle.
Step 2: Frosting the Cake
1. Add the First Layer of Frosting
- Set one cake layer on a cake stand or serving plate.
- Use an offset spatula or a regular spatula to evenly coat the top with a thick layer of chocolate frosting.
2. Stack the Second Cake Layer
- Carefully position the second cake layer on top, making sure it aligns properly with the bottom layer.
- Lightly press it down to ensure it stays in place.
3. Apply a Crumb Coat
- Spread a light coating of frosting around the entire cake to trap any loose crumbs.
- This step prevents crumbs from mixing into the outer frosting layer, ensuring a smooth final finish.
4. Let the Crumb Coat Set
- Place the cake in the refrigerator for 15-20 minutes so the thin layer of frosting firms up before adding the final coat.
5. Frost the Cake Completely
- Evenly distribute the remaining frosting over the entire cake, starting at the top and working your way down the sides.
- Use a spatula or a cake scraper to smooth out the frosting for a polished look.
Step 3: Decorating Your Cake
Now comes the fun part—decorating! Here are some ideas to make your cake look even more impressive:
Simple and Elegant:
- Chocolate shavings or curls: Use a vegetable peeler on a chocolate bar to create elegant shavings.
- Dust with cocoa powder: Lightly dust the top for a classic look.
Indulgent and Fancy:
- Ganache Drip: Pour warm chocolate ganache over the edges for a stunning drip effect.
- Piped Frosting Swirls: Use a piping bag to create swirls around the edges.
Playful and Fun:
- Sprinkles: Add chocolate or colorful sprinkles for a festive touch.
- Fresh Berries: Decorate with strawberries, raspberries, or blueberries for a fresh contrast.
Step 4: Let the Cake Set
- Once frosted, allow the cake to rest at room temperature for 30 minutes, or chill in the refrigerator for a firmer consistency.
- Letting the cake sit before serving enhances the flavors, making each bite even more delicious.
Now that your cake is fully assembled and decorated, it’s time to slice and enjoy!
Expert Tips for the Best Chocolate Cake
Now that you’ve assembled and decorated your cake, let’s go over some expert techniques to make sure your chocolate cake turns out perfect every time. Whether it’s about enhancing the flavor, achieving the best texture, or storing your cake properly, these tips will help you take your baking skills to the next level.
Tip 1: Use Room Temperature Ingredients
- Ingredients like eggs, buttermilk, and butter should be at room temperature before mixing.
- This ensures they blend smoothly, creating a uniform batter and preventing a dense cake.
Tip 2: Don’t Overmix the Batter
- Stirring too much can overdevelop the gluten in the flour, leading to a tough cake.
- Mix only until the ingredients are just combined for a light and tender texture.
Tip 3: Enhance the Chocolate Flavor
- Adding a teaspoon of espresso powder or using hot coffee instead of water can intensify the chocolate taste without making it taste like coffee.
- Quality unsweetened cocoa powder also makes a big difference in depth of flavor.
Tip 4: Maintain the Right Baking Temperature
- It’s crucial to allow your oven to fully reach the set temperature before placing the cake inside.
- Using an oven thermometer can help ensure accurate heat levels, as ovens can sometimes run hotter or cooler than indicated.
Tip 5: Prevent Dryness in Your Cake
- Baking the cake longer than needed can result in a dry texture, so be mindful of the baking time.
- Check for doneness by inserting a toothpick into the center—if it comes out clean or with a few crumbs, it’s ready.
- If your cake does turn out dry, a simple syrup glaze (made with sugar and water) can be brushed on top to add moisture.
Tip 6: Proper Cake Storage
For Short-Term Storage:
- Store the cake covered at room temperature for up to two days to keep it soft and fresh.
- If your kitchen is warm, refrigerate it to prevent the frosting from melting.
For Long-Term Storage:
- If storing for longer, refrigerate the cake in an airtight container for up to 5 days.
- To freeze, wrap each cake layer separately in plastic wrap and store in an airtight bag. Thaw at room temperature before serving.
By following these expert tips, you can ensure that every chocolate cake you bake is delicious, moist, and beautifully presented.
Frequently Asked Questions (FAQ) About Chocolate Cake
Baking the perfect chocolate cake can sometimes come with challenges. To help you achieve the best results every time, here are answers to some of the most commonly asked questions about making and storing chocolate cake.
1. Can I Make This Cake in Advance?
Yes! You can prepare the cake layers ahead of time. After they have completely cooled, wrap them securely in plastic wrap and leave them at room temperature for up to two days. If you need to store them for a longer period, refrigerate for up to five days or freeze for up to three months. When ready to use, let the frozen cake reach room temperature before frosting.
2. What If I Don’t Have Buttermilk?
If you don’t have buttermilk, you can make a substitute using regular milk. Simply add 1 tablespoon of white vinegar or lemon juice to 1 cup of milk and let it sit for about 5 minutes before using. This homemade buttermilk alternative helps keep the cake moist and adds a slight tangy flavor.
3. Why Does My Cake Sink in the Middle?
A cake that collapses in the center is usually caused by one of these factors:
- Opening the oven door too early, leading to sudden temperature changes.
- Overmixing the batter, which creates excess air that later deflates.
- Inaccurate oven temperature, which may be too hot or too cool. To avoid this issue, use an oven thermometer to ensure the correct baking temperature.
To prevent this, avoid opening the oven door before the cake is fully set, mix the batter just until combined, and always bake at the correct temperature.
4. How Can I Make My Chocolate Cake More Moist?
For a cake that remains soft and tender:
- Use oil instead of butter, as oil helps retain moisture longer.
- Add hot coffee or boiling water to bloom the cocoa powder, which enhances flavor and keeps the cake from drying out.
- Do not overbake—test with a toothpick and remove the cake from the oven as soon as it comes out clean or with a few moist crumbs.
5. What’s the Best Way to Store Leftover Cake?
- At room temperature: Store leftover cake in an airtight container for up to two days.
- In the refrigerator: If your home is warm, refrigerate the cake for up to five days. Let it sit at room temperature for about 30 minutes before serving so it softens.
- In the freezer: Wrap slices or whole cakes tightly in plastic wrap, place them in an airtight container, and store them in the freezer for up to three months. When ready to eat, allow it to thaw at room temperature before serving.
6. Can I Use a Different Frosting Instead of Chocolate?
Absolutely! While chocolate frosting pairs perfectly with this cake, you can try other flavors to switch things up:
- Vanilla Buttercream for a light and classic contrast.
- Tangy Cream Cheese Frosting for a smooth, slightly tart, and creamy finish.
- Peanut Butter Frosting for a sweet and nutty variation.
- Whipped Ganache for a silky and elegant touch.
By following these expert tips and answers, you can confidently bake a flawless chocolate cake every time. Whether you’re making it for a special occasion or just to satisfy a craving, this ultimate chocolate cake recipe is sure to impress.
Now, it’s time to slice, serve, and enjoy your homemade chocolate masterpiece!
Conclusion
ore than just following a recipe—it’s about creating something indulgent, rich, and full of flavor that brings joy to every bite. Whether you’re making it for a special occasion or simply to treat yourself, using high-quality ingredients, the right techniques, and expert baking tips will ensure you get a perfectly moist and delicious cake every time.
From selecting the best cocoa powder to mastering the ideal frosting consistency, each step in this guide is designed to help you bake with confidence. Now that you have all the knowledge and techniques needed, it’s time to put on your apron, gather your ingredients, and create a show-stopping chocolate cake that will impress anyone who takes a bite.
So, why wait? Try this recipe today and experience the best homemade chocolate cake—one that’s rich, moist, and absolutely irresistible.