
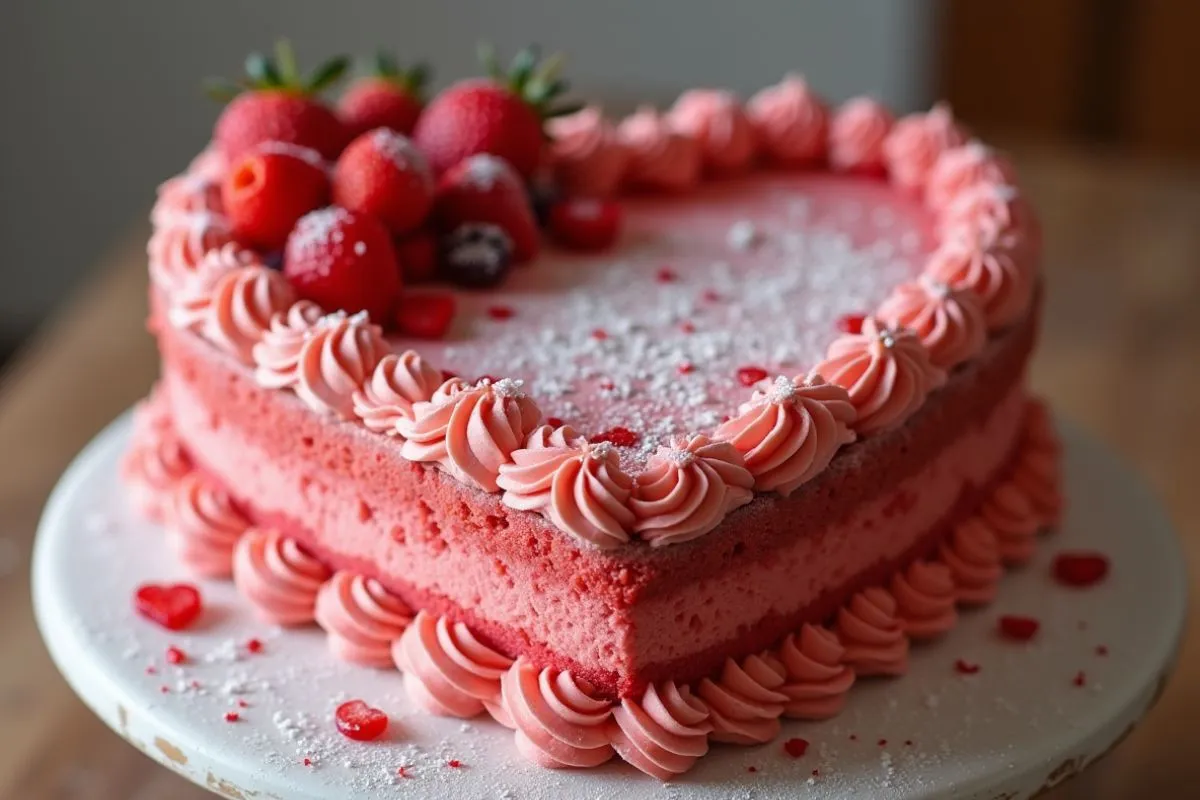
Few things express love better than a homemade heart cake. Whether it’s a romantic gesture, a celebration of a milestone, or just a way to bring joy to someone special, a heart-shaped cake adds a personal touch that makes any occasion unforgettable.
However, getting the perfect shape, taste, and texture can feel like a challenge—especially if you don’t have a heart-shaped pan. But don’t worry! This guide will take you through each step, helping you create a beautiful and delicious cake from scratch. Whether you’re a beginner baker or an experienced pro, you’ll find tips and tricks that will elevate your baking skills. So, let’s dive in and get started!
Table of Contents
Selecting the Perfect Cake Recipe
Before you begin mixing, it’s essential to choose the right type of cake. The flavor, consistency, and moisture level will all contribute to the final result. Below are some classic recipes that work exceptionally well for a heart cake.
1 Timeless Vanilla Cake
A fluffy, buttery vanilla cake is always a safe bet. It’s light, flavorful, and pairs well with almost any filling or frosting.
Ingredients:
| Ingredient | Quantity |
|---|---|
| All-purpose flour | 2 ½ cups |
| Baking powder | 2 ½ tsp |
| Salt | ½ tsp |
| Unsalted butter | 1 cup |
| Granulated sugar | 2 cups |
| Eggs | 4 large |
| Vanilla extract | 1 tbsp |
| Whole milk | 1 cup |
Instructions:
- Set your oven to 350°F (175°C) and grease your baking pans to prepare them.
- In aCombine the flour, baking powder, and salt in a bowl, mixing them thoroughly.
- In a separate bowl, beat the butter and sugar together until smooth and airy.
- Add the eggs individually, ensuring each one is well blended before introducing the next. Stir in the vanilla extract.
- Alternately add dry ingredients and milk to the butter mixture, starting and ending with the flour.
- Pour the batter into your prepared pan and bake for 30-35 minutes or until a toothpick inserted in the center comes out clean.
2 Indulgent Chocolate Cake
A rich, velvety chocolate cake is perfect for those who love deep, intense flavors.
Ingredients:
| Ingredient | Quantity |
|---|---|
| All-purpose flour | 2 cups |
| Cocoa powder | ¾ cup |
| Baking soda | 1 ½ tsp |
| Salt | 1 tsp |
| Unsalted butter | 1 cup |
| Brown sugar | 1 ½ cups |
| Eggs | 3 large |
| Vanilla extract | 2 tsp |
| Buttermilk | 1 cup |
| Hot water | 1 cup |
Instructions:
- Set your oven to 350°F (175°C) and grease the baking pans.
- In a bowl, sift the flour, cocoa powder, baking soda, and salt together.
- In another bowl, cream the butter and sugar until the texture becomes light and fluffy.
- Add eggs individually, blending well after each addition. Stir in the vanilla extract.
- Gradually alternate between adding the dry mixture and buttermilk. Finally, mix in hot water until fully incorporated.
- Pour the batter into your cake pan and bake for 30-35 minutes, or until a toothpick inserted into the center comes out clean.
3 Exploring Flavor Options
If you’re looking to switch things up, here are some fantastic variations:
- Red Velvet Cake – A smooth, slightly chocolatey cake with a touch of tanginess.
- Lemon Cake – A refreshing option with a citrusy burst, perfect for pairing with berry fillings.
- Almond Cake – A nutty and rich cake that complements fruit flavors beautifully.
Each of these flavors creates a wonderful base for your heart cake, so pick the one that suits your occasion best!
Up next in Part 2, we’ll explore different ways to bake your cake into a heart shape, even if you don’t own a specialized pan!
Baking Your Heart-Shaped Cake
With your chosen cake recipe ready, it’s time to give it that signature heart shape. If you have a heart-shaped pan, the process is straightforward. But don’t worry if you don’t have one—you can still create a perfectly shaped heart cake with a simple trick. Let’s go through both approaches.
1 Baking with a Heart-Shaped Pan
If you already have a heart-shaped cake pan, follow these steps for an effortless bake:
- Set your oven to 350°F (175°C) and coat the pan with grease to prevent sticking.
- Pour the batter into the pan, ensuring it fills about two-thirds of the way.
- Lightly tap the pan against the counter to remove any air bubbles trapped in the batter.
- Bake according to the time specified in your recipe, typically around 30-35 minutes, depending on the type of cake.
- Test for doneness by inserting a toothpick into the center—if it comes out clean, your cake is fully baked.
- Let the cake rest in the pan for approximately 10 minutes before moving it to a wire rack to cool fully.
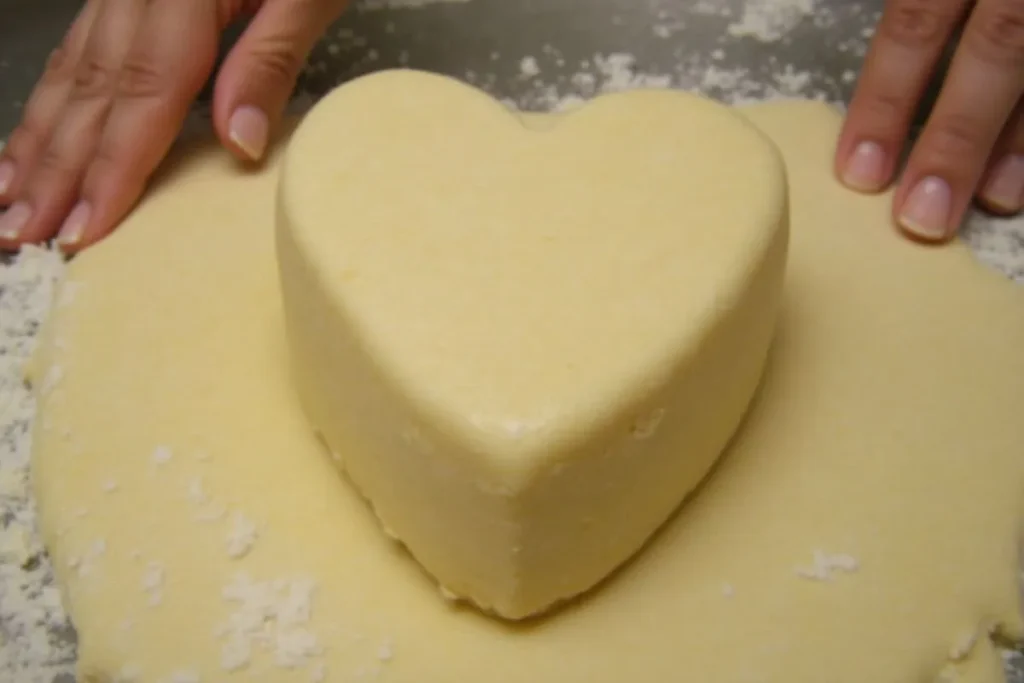
2 Shaping a Heart Without a Special Pan
No heart-shaped pan? No worries!You can craft a lovely heart-shaped cake by using a round pan and a square pan with this smart method.
What You’ll Need:
✔ One 8-inch round cake pan
✔ One 8-inch square cake pan
✔ A sharp knife
✔ A flat surface for assembling
Steps to Create a Heart Shape:
- Bake the Cakes
- Grease both pans and preheat your oven to 350°F (175°C).
- Pour an equal amount of batter into each pan and bake according to your recipe.
- Let the cakes cool completely before cutting.
- Cutting the Round Cake
- Once the cake has cooled, carefully slice the round cake in half to create two equal semicircles.
- Assembling the Heart
- Place the square cake on a flat surface with one corner facing you, forming a diamond shape.
- Position the two semicircles on the top two sides of the square to create a heart.
- Secure the Cake with Frosting
- Apply a thin layer of frosting between the cake pieces to keep them in place before decorating.
👉 With this easy technique, you can turn simple cake layers into a stunning heart with no special tools required!
3 Tips for Even Baking
For a perfectly baked heart cake, keep these helpful tips in mind:
✔ Use ingredients at room temperature – This helps blend the batter smoothly and ensures even baking.
✔ Avoid overmixing the batter – Overmixing can make your cake dense and tough, so stir just until the ingredients are combined.
✔ Rotate the pan halfway through baking – This helps the cake bake evenly and prevents overbrowning on one side.
✔ Check for doneness a few minutes early – Since oven temperatures vary, start checking your cake a few minutes before the recommended baking time.
Now that your cake is baked and perfectly shaped, it’s time for the fun part—choosing the best fillings and frostings!
Preparing Fillings and Frostings
Now that your heart cake has been baked and shaped, it’s time to elevate its flavor with delicious fillings and frostings. The right combination of textures and flavors can transform an ordinary cake into something extraordinary. Whether you love buttercream, cream cheese frosting, or fruit fillings, this section will help you choose the best options for your cake.
1 Choosing the Best Frosting for Your Heart Cake
Frosting isn’t just about taste—it’s also what gives your cake that polished, professional look. Below are some of the most popular frostings that work beautifully for a heart cake.
Buttercream Frosting (Smooth & Versatile)
This classic frosting is known for its creamy texture and ease of use, making it perfect for decorating.
Ingredients:
| Ingredient | Quantity |
|---|---|
| Unsalted butter | 1 cup |
| Powdered sugar | 4 cups |
| Vanilla extract | 1 tsp |
| Heavy cream | 2-4 tbsp |
Instructions:
- Whip the butter in a bowl until it becomes airy and soft.
- Gradually incorporate powdered sugar, ensuring each portion is fully mixed before adding more.
- Mix in the vanilla extract to bring out the flavor.
- Add heavy cream little by little until the frosting reaches your desired consistency.
This frosting is ideal for smooth finishes, intricate piping, and layered decorations.
Cream Cheese Frosting (Tangy & Sweet)
For those who enjoy a slight tang with their sweetness, cream cheese frosting is an excellent option—especially when paired with red velvet or carrot cake.
Ingredients:
| Ingredient | Quantity |
|---|---|
| Cream cheese | 8 oz |
| Unsalted butter | ½ cup |
| Powdered sugar | 4 cups |
| Vanilla extract | 1 tsp |
Instructions:
- Blend the butter and cream cheese until smooth and lump-free.
- Slowly incorporate the powdered sugar, ensuring a smooth consistency.
- Enhance the flavor by adding vanilla extract and mixing thoroughly.
This frosting spreads effortlessly and complements fresh fruit beautifully.
2 Enhancing Flavor with Fillings
A heart cake isn’t just about the outer frosting—it’s also about the delicious surprise inside! Adding a filling between the layers makes every bite more indulgent.
Popular Filling Choices:
✔ Fruit Preserves (Strawberry, Raspberry, or Apricot) – Brings a fruity contrast to the cake’s sweetness.
✔ Chocolate Ganache – A silky, rich filling that pairs perfectly with both vanilla and chocolate cakes.
✔ Whipped Cream with Fresh Berries – Light and airy, this option adds a fresh and delicate touch.
3 Assembling Your Cake with Fillings & Frostings
Once you’ve selected your frosting and filling, it’s time to bring everything together. Follow these steps for a well-structured, beautifully layered cake:
Step 1: Level the Cake Layers
- Use a serrated knife to trim any uneven tops, ensuring a flat surface for stacking.
- If you used the heart cake cutting method, check that all pieces align properly before adding the filling.
Step 2: Add the Filling
- Position the first cake layer on a clean surface to prepare for stacking.
- Pipe a thin border of frosting around the edge to keep the filling contained.
- Evenly spread your chosen filling (fruit preserves, ganache, or whipped cream) within the frosting border.
Step 3: Stack and Frost
- Gently place the second cake layer over the filling, pressing lightly to hold everything in place.
- Apply a thin crumb coat—a light layer of frosting that helps seal in crumbs—before chilling for 10-15 minutes.
- Once firm, apply the final layer of frosting, smoothing it out for a polished finish.
With your heart cake now fully assembled, it’s time to move on to the most exciting step—decorating!

Assembling and Decorating Your Heart Cake
Now that your heart cake is baked, filled, and frosted, it’s time for the most exciting step—decorating! This is where you get to be creative, adding beautiful details that will make your cake visually stunning. Whether you prefer a classic smooth finish or want to go all out with piping, sprinkles, and edible decorations, this section will guide you through the process step by step.
1 Preparing for Decoration
Before jumping into decorating, ensure that your cake is properly chilled and set. This will make frosting application and detailing much easier. Follow these steps to get your cake ready:
- Chill the Cake: After applying the crumb coat, refrigerate for 10-15 minutes to let it firm up.
- Apply the Final Frosting Layer: Use an offset spatula to spread an even coat of frosting over the entire cake.
- Smooth the Surface: If you want a flawless finish, use a bench scraper or a spatula to smooth out the frosting.
Once your base is ready, you can start adding decorations!
2 Piping Designs for a Stunning Finish
Piping is one of the easiest ways to elevate your cake’s appearance. Using a piping bag and decorative tips, you can create various designs, from simple borders to elegant rosettes.
Basic Piping Techniques to Try:
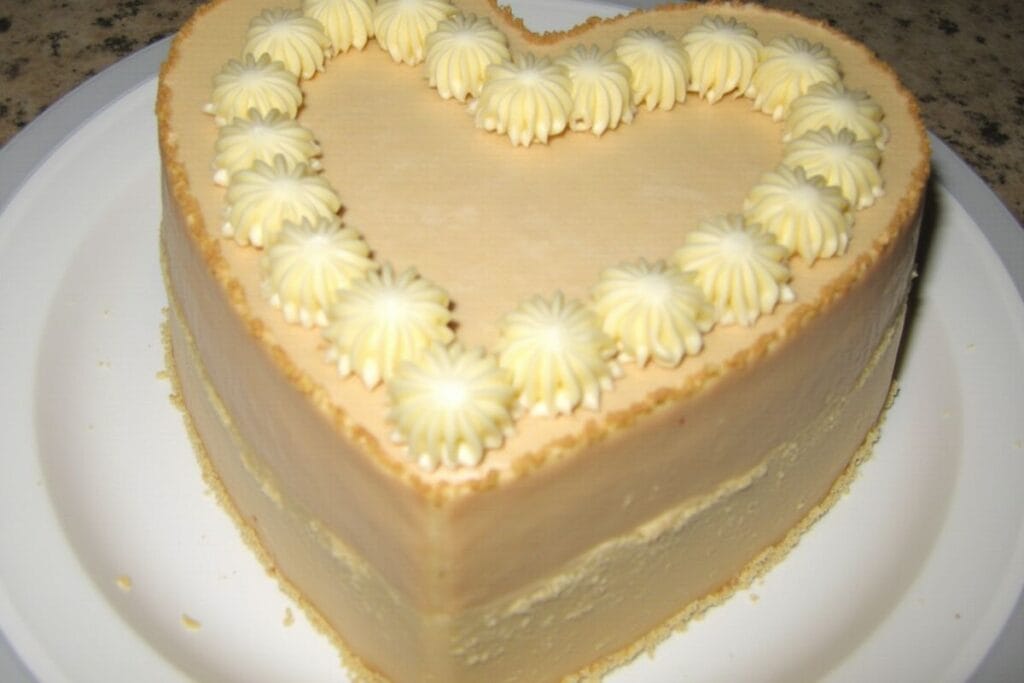
✔ Shell Border: Use a star tip to pipe small, overlapping shells around the edges of the cake.
✔ Rosettes: Pipe swirls in a circular motion to create delicate rose-like designs.
✔ Ruffled Edges: Move the piping bag in a wavy motion along the border for a textured effect.
Pro Tip: If you’re new to piping, practice on parchment paper before applying designs directly to the cake.
3 Decorating with Edible Toppings
Adding edible decorations brings extra charm and personality to your heart cake. Here are some simple yet beautiful ways to enhance your design:
Toppings That Work Well:
✔ Sprinkles & Sugar Pearls – Adds color and texture for a festive look.
✔ Fresh Berries – Strawberries, raspberries, and blueberries make a great topping.
✔ Edible Flowers – Use roses, violets, or pansies to create a floral theme.
✔ Chocolate Shavings – Sprinkle dark or white chocolate curls for an elegant touch.
How to Apply Decorations:
- Gently press sprinkles onto the sides of the cake before the frosting sets.
- Arrange fresh berries in a heart shape on the top of the cake for a simple yet stunning effect.
- Use chocolate drips along the edges by pouring slightly cooled melted chocolate over the top.
4 Writing Messages on Your Cake
If you want to add a personalized message, here’s how to do it neatly:
- Use a Toothpick First: Lightly trace your message on the cake before piping to avoid mistakes.
- Choose the Right Tip: Use a fine round tip for clean, legible writing.
- Go Slow: Pipe in a steady motion to ensure smooth and even lettering.
Some ideas for messages include:
✔ “Happy Anniversary!”
✔ “I Love You!”
✔ “Sweetest Day Ever!”
5 The Final Touch: Presentation & Serving
Once your heart cake is decorated, it’s time to present it beautifully!
Tips for Serving & Presentation:
✔ Use a Cake Stand: Elevates the cake for a professional display.
✔ Dust with Powdered Sugar: A light dusting adds elegance, especially on chocolate cakes.
✔ Add Candles or Cake Toppers: Perfect for birthdays or celebrations.
Now that your heart cake looks amazing, the only thing left to do is slice and enjoy! But before we wrap things up, let’s go over some expert tips to keep your cake moist, fluffy, and delicious.
Tips for a Moist and Fluffy Cake
Now that your heart cake is beautifully decorated and ready to impress, let’s make sure it tastes just as amazing as it looks! A cake that’s too dry or too dense can take away from the experience, so here are some essential baking tips to ensure your cake stays moist, soft, and fluffy.
1 Use High-Quality Ingredients
The quality of your ingredients plays a huge role in the taste and texture of your cake. Always opt for fresh and high-quality ingredients, especially when it comes to:
✔ Butter – Use real butter instead of margarine for the best flavor.
✔ Flour – Choose cake flour for a lighter texture or sift all-purpose flour for a smoother batter.
✔ Eggs – Use room temperature eggs, as they blend better into the batter.
✔ Sugar – Fine granulated sugar helps create a softer crumb.
2 Measure Ingredients Accurately
Baking is a science, and even small miscalculations can affect the final outcome. Always:
✔ Spoon and level flour instead of scooping directly from the bag to avoid using too much.
✔ Use a kitchen scale for precise measurements, especially for flour and sugar.
✔ Follow the recipe exactly and avoid guessing ingredient amounts.
3 Avoid Overmixing the Batter
Overmixing causes the gluten in the flour to develop too much, resulting in a dense and tough cake. To prevent this:
✔ Mix only until combined – Once the dry and wet ingredients are incorporated, stop mixing.
✔ Use a low-speed setting on a mixer or stir gently by hand.
✔ Fold in delicate ingredients like berries or chocolate chips instead of stirring vigorously.
4 Bake at the Right Temperature
✔ Preheat your oven before baking so the cake starts cooking evenly.
✔ Use an oven thermometer to ensure accuracy—many ovens run hotter or cooler than the set temperature.
✔ Avoid opening the oven door too often while baking, as it can cause the cake to sink.
5 Keep Your Cake Moist After Baking
Once your cake is baked, keeping it moist and soft is key. Here’s how:
✔ Let it cool properly – Don’t leave it in the pan too long, as it will continue cooking and dry out.
✔ Wrap in plastic wrap – If not serving immediately, wrap the cake layers tightly to keep them from drying out.
✔ Brush with simple syrup – Lightly brushing a sugar syrup on the cake layers before frosting helps lock in moisture.
6 Store Your Cake Properly
To keep your heart cake fresh for longer, follow these storage tips:
✔ Room Temperature: If eating within 24 hours, keep the cake covered in an airtight container.
✔ Refrigerator: For longer storage, refrigerate the cake, but allow it to come to room temperature before serving.
✔ Freezer: Cake layers can be frozen for up to 3 months—just wrap them well in plastic wrap and foil.
With these expert tips, your heart cake will not only look stunning but will also be soft, moist, and absolutely delicious. Now, let’s move on to common mistakes to avoid so you can perfect your cake every time!
Common Mistakes to Avoid
Even experienced bakers can run into problems when making a heart cake. From dry cake layers to uneven frosting, small missteps can affect the final result. To help you achieve a perfectly shaped, moist, and beautifully decorated cake, let’s go over some of the most common mistakes and how to avoid them.
1 Skipping the Crumb Coat
A crumb coat is a thin layer of frosting applied before the final coat to trap loose crumbs. Skipping this step can lead to crumbs mixing into your final frosting, creating a messy, uneven finish.
✔ How to Fix It:
- Always apply a thin layer of frosting first, then chill the cake for 10-15 minutes before adding the final coat.
2 Overmixing the Batter
Overmixing leads to a dense, tough cake instead of a soft and fluffy one. This happens because mixing too much overdevelops the gluten in the flour.
✔ How to Fix It:
- Mix only until the ingredients are combined—no more.
- Use a low-speed setting on a mixer or stir gently by hand.
3 Not Properly Greasing the Cake Pan
Forgetting to grease and flour the pan can cause the cake to stick, making it difficult to remove in one piece.
✔ How to Fix It:
- Always coat the pan with butter or non-stick spray, then dust it lightly with flour or cocoa powder.
- Use parchment paper on the bottom for extra protection.
4 Uneven Baking or a Sinking Cake
If your cake is raw in the center but overcooked on the edges, your oven temperature might be uneven, or you may have opened the door too soon.
✔ How to Fix It:
- Check your oven’s accuracy by using a thermometer to verify the correct baking temperature.
- Keep the oven door closed until at least three-fourths of the baking time has passed to prevent sudden temperature drops.
- Place the cake in the middle of the oven to ensure it bakes evenly on all sides.
5 Frosting a Warm Cake
If you apply frosting before the cake is completely cooled, the frosting will melt and slide off, making it difficult to decorate.
✔ How to Fix It:
- Let the cake cool completely on a wire rack before frosting—this usually takes 1-2 hours.
- If you’re short on time, place the cake in the fridge for 30 minutes before decorating.
6 Cutting the Cake Too Soon
It’s tempting to slice into your beautiful heart cake immediately, but cutting too soon can make it crumble and fall apart.
✔ How to Fix It:
- After frosting, let the cake sit for at least 30 minutes to allow the layers to set.
- Use a sharp, serrated knife for clean slices.
By avoiding these common baking mistakes, you’ll ensure your heart cake turns out moist, delicious, and picture-perfect every time.
Up next in Part 7, we’ll answer some frequently asked questions to help with any last-minute cake concerns!
Frequently Asked Questions (FAQs)
Even with a detailed guide, you might still have some questions about baking and decorating a heart cake. Here are answers to some of the most common concerns bakers have when making this special dessert.
1 Can I Make a Heart Cake Without a Special Pan?
Yes! If you don’t have a heart-shaped cake pan, you can still achieve the perfect shape using a round pan and a square pan. Simply cut the round cake in half and place each half against two sides of the square cake to form a heart. Secure the pieces together with frosting before decorating.
2 What Are the Best Flavor Combinations for a Heart Cake?
A heart cake can be customized with various flavor combinations. Here are some popular options:
✔ Classic Vanilla Cake + Strawberry Buttercream – Light and sweet with a fruity twist.
✔ Chocolate Cake + Raspberry Filling – Rich and decadent with a tart contrast.
✔ Red Velvet Cake + Cream Cheese Frosting – A timeless pairing with a slight tang.
✔ Lemon Cake + Blueberry Filling – Refreshing and bright, perfect for summer occasions.
3 How Far in Advance Can I Bake and Decorate the Cake?
You can bake the cake layers up to 2 days in advance if stored properly. Wrap them tightly in plastic wrap and keep them at room temperature or refrigerate them if needed.
For decorating, it’s best to frost the cake on the same day you plan to serve it to maintain freshness. However, if necessary, a fully frosted cake can be refrigerated for up to 24 hours. Before serving, let it rest at room temperature for approximately 30 minutes to soften.
4 How Do I Prevent Crumbs from Getting into the Frosting?
To avoid crumbs mixing into your frosting, always use a crumb coat—a thin layer of frosting applied before the final coat. Here’s how:
- Spread a light coating of frosting evenly over the cake to seal in any loose crumbs.
- Refrigerate for 10-15 minutes to allow the crumb coat to set.
- Add the final layer of frosting, smoothing it out for a clean, professional look.
5 What Tools Are Essential for Decorating a Heart Cake?
✔ Offset Spatula – Helps spread frosting smoothly.
✔ Piping Bags & Tips – Allows for decorative designs like borders and rosettes.
✔ Bench Scraper – Creates an even, polished finish on the frosting.
✔ Cake Turntable – Makes decorating easier by allowing smooth rotations.
✔ Toothpicks or Stencils – Helps with precise lettering and design outlines.
6 Can I Freeze a Heart Cake?
Yes, both cake layers and a fully frosted cake can be frozen. Here’s how:
✔ Cake Layers: Wrap them in plastic wrap, then aluminum foil, and freeze for up to 3 months. Thaw at room temperature before frosting.
✔ Frosted Cake: First, freeze the cake uncovered for 30 minutes to firm up the frosting, then wrap it tightly in plastic wrap. When ready to serve, transfer it to the refrigerator and let it defrost overnight.
7 What Are Some Ways to Make a Heart Cake Look More Elegant?
✔ Chill the Cake Before Frosting: This makes it easier to apply a smooth coat of frosting.
✔ Use a Bench Scraper: Helps create clean, straight edges.
✔ Practice Piping on Parchment Paper: Before piping on the cake, practice your designs to perfect your technique.
✔ Keep Decorations Simple and Elegant: Sometimes, less is more. A few well-placed flowers, sprinkles, or chocolate drips can elevate the look.
With these answers to frequently asked questions, you’ll be well-prepared to create a stunning and delicious heart cake with confidence.
Conclusion
Creating a heart cake from scratch is more than just baking—it’s about expressing love through a homemade masterpiece. Whether you’re celebrating Valentine’s Day, an anniversary, a birthday, or a special occasion, this guide has equipped you with everything you need to bake, assemble, and decorate a stunning heart-shaped cake.
From selecting the perfect cake recipe to mastering baking techniques, fillings, frostings, and decorations, each step plays a crucial role in achieving a cake that is not only beautiful but also delicious. By following these tips and avoiding common mistakes, you can ensure that your cake turns out moist, fluffy, and picture-perfect every single time.
Final Tips to Remember:
✔ Choose the right recipe to suit the occasion and personal preferences.
✔ If you don’t have a heart-shaped pan, use the square-and-round cake method.
✔ Always use a crumb coat before applying the final frosting layer.
✔ Get creative with decorations using piping, fresh fruit, chocolate, or sprinkles.
✔ Store and serve properly to keep the cake fresh and flavorful.
A well-made heart cake is more than just dessert—it’s a heartfelt gesture that brings joy to anyone who receives it.