
When the leaves begin to change and there’s a crispness in the air, there’s one thing that truly welcomes the season—pumpkin-flavored treats. If you love simple yet mouthwatering desserts, pumpkin dump cake is the perfect recipe to add to your fall baking list. This dessert offers the warmth of pumpkin pie combined with the ease of a dump cake, making it a must-try for any pumpkin lover.
Unlike traditional cakes, this easy pumpkin dump cake requires no mixing, kneading, or complicated steps. All you need to do is layer the ingredients, pop it in the oven, and let the magic happen. It’s a stress-free, crowd-pleasing dessert that’s ideal for Thanksgiving, holiday gatherings, or just a cozy night at home.
In this article, you’ll learn everything you need to know about making the perfect pumpkin dump cake. From essential ingredients and step-by-step instructions to expert tips and serving ideas, this guide will ensure your cake turns out delicious every time. You’ll also find answers to common questions and suggestions for variations to make this recipe truly your own.
Table of Contents

The Ultimate Easy Pumpkin Dump Cake Recipe for Fall
There’s something magical about fall baking. The combination of cinnamon, nutmeg, and pumpkin creates a warm, inviting aroma that fills your home with comfort. If you’re someone who enjoys fall flavors but doesn’t want to spend hours in the kitchen, this pumpkin dump cake recipe is exactly what you need.
Why You’ll Love This Recipe
- Effortless Preparation: No need for complicated steps—just layer the ingredients and bake.
- Incredible Flavor: A perfect blend of pumpkin, warm spices, and a buttery cake topping.
- Great for Any Occasion: Perfect for family gatherings, potlucks, or an after-dinner treat.
- Customizable: Add nuts, caramel drizzle, or whipped cream for extra indulgence.
What Makes Dump Cake Different?
Unlike traditional cakes, a dump cake doesn’t require mixing the dry and wet ingredients separately. Instead, the dry cake mix is “dumped” over the pumpkin layer and baked until golden brown. The result is a dessert that’s crispy on top, soft in the middle, and bursting with flavor.
What You’ll Learn in This Guide
- The ingredients and possible substitutions for a perfect dump cake.
- A step-by-step guide to ensure your cake turns out flawless.
- Expert tips and tricks for the best texture and flavor.
- How to store, serve, and customize your cake for different occasions.
- Answers to frequently asked questions to help you troubleshoot any issues.
With this guide, you’ll be able to make a delicious pumpkin dump cake that will impress your family and friends without the hassle of traditional baking. Let’s move on to the next section, where we’ll dive into what makes a dump cake unique and why it’s the perfect fall dessert.
What is a Dump Cake?
Understanding the Magic of Dump Cakes
If you’re new to the idea of a dump cake, you might be wondering what makes it different from other desserts. The term “dump cake” may not sound fancy, but the results are undeniably delicious. This dessert is all about ease and convenience, making it a go-to recipe for busy home bakers or anyone who loves a sweet treat with minimal effort.
At its core, a dump cake involves layering ingredients in a baking dish without mixing, then baking until golden and bubbly. Unlike traditional cakes, there’s no need for a stand mixer, hand whisking, or folding ingredients. Just pour, layer, and bake—it’s that simple.
Why is It Called a Dump Cake?
The name comes from the way the ingredients are assembled. Instead of mixing the batter in a bowl, you “dump” the ingredients directly into the baking dish in layers. The dry cake mix is sprinkled over the wet filling (in this case, a pumpkin mixture), and then butter is added on top to help it bake into a rich, crumbly topping.
How is Dump Cake Different from Other Desserts?
| Feature | Dump Cake | Traditional Cake | Crisp or Cobbler |
|---|---|---|---|
| Mixing Required? | No | Yes | No |
| Uses Cake Mix? | Yes | Sometimes | No |
| Texture | Soft filling, crunchy top | Fluffy, uniform | Fruity with crumbly topping |
| Effort Level | Very Easy | Moderate | Easy |
Unlike a traditional cake, where you cream butter and sugar together before gradually adding dry ingredients, a dump cake skips the mixing process entirely. It also differs from a cobbler or crisp because the topping is made from dry cake mix instead of oats or streusel.
Why You Should Make a Dump Cake
Still wondering if a pumpkin dump cake is worth trying? Here’s why it should be on your fall baking list:
- Minimal Prep Time: No need for multiple bowls or fancy kitchen equipment.
- Perfect for Beginners: Even if you’re new to baking, this recipe is fail-proof.
- Rich, Comforting Flavor: The pumpkin filling is creamy, while the cake mix topping is buttery and crisp.
- Versatile: Swap out ingredients, add toppings, or adjust sweetness to your preference.
- Ideal for Large Gatherings: This cake is perfect for potlucks, family dinners, and holiday feasts.

Ingredients and Substitutions
Simple Ingredients for a Flavorful Dessert
One of the best things about pumpkin dump cake is that it requires only a few simple ingredients—most of which you probably already have in your pantry. Unlike traditional pumpkin desserts, this recipe eliminates the need for pie crust or complex techniques, making it quick, convenient, and beginner-friendly.
Below, you’ll find the essential ingredients for this easy pumpkin dump cake, along with possible substitutions in case you need to adjust the recipe based on availability or dietary preferences.
Core Ingredients and Their Functions
| Ingredient | Quantity | Purpose / Possible Substitutes |
|---|---|---|
| Pumpkin Purée | 1 can (15 oz) | Provides the main flavor and texture. Do not use pumpkin pie filling, as it contains added sugar and spices. |
| Evaporated Milk | 1 can (12 oz) | Creates a creamy texture. Can substitute with heavy cream or half-and-half for a richer taste. |
| Eggs | 3 | Helps bind the ingredients together and creates structure. Use flax eggs for a vegan version. |
| Granulated Sugar | 1 cup | Adds sweetness and enhances flavor. Brown sugar can be used for a deeper, caramelized taste. |
| Pumpkin Pie Spice | 2 teaspoons | A blend of cinnamon, nutmeg, ginger, and cloves. Can make your own using individual spices. |
| Vanilla Extract | 1 teaspoon | Enhances flavor. Optional but recommended for depth. |
| Yellow Cake Mix | 1 box (about 15 oz) | Forms the crumbly, buttery topping. Spice cake mix can be used for extra flavor. Gluten-free cake mix works too. |
| Butter | 1 cup (melted) | Adds richness and helps form a crisp topping. Use dairy-free butter for a vegan version. |
| Chopped Nuts (Optional) | ½ cup | Pecans or walnuts add crunch and flavor. Can omit if preferred. |
Ingredient Variations and Substitutions
1. Making It Less Sweet
- Reduce the granulated sugar to ¾ cup or use a sugar substitute like monk fruit or stevia.
- Swap yellow cake mix for spice cake mix, which has added spice but less sweetness.
2. Dairy-Free or Vegan Version
- Replace evaporated milk with full-fat coconut milk for a creamy, dairy-free option.
- Substitute with flax eggs (1 tablespoon of ground flaxseed mixed with 3 tablespoons of water per egg).
- Swap melted butter for vegan butter or coconut oil.
3. Adding Extra Flavor
- Mix in ½ teaspoon of cinnamon into the cake mix before sprinkling it over the pumpkin layer.
- Stir in ¼ cup of maple syrup to the pumpkin mixture for a deeper fall flavor.
- Add a handful of white chocolate chips or toffee bits for a sweet twist.
4. Making It Gluten-Free
- Use a gluten-free yellow cake mix, which works just as well as regular cake mix.
Why These Ingredients Work Together
This dump cake is essentially a hybrid between pumpkin pie and a buttery crisp topping. Here’s why each ingredient plays an important role:
- The pumpkin purée and eggs create a smooth, custard-like base.
- Evaporated milk adds creaminess without making the filling too runny.
- Cake mix and butter form a golden, crumbly crust as they bake.
- Pumpkin spice and vanilla enhance the warm, seasonal flavor.
With the right ingredients in place, you’re ready to start assembling your pumpkin dump cake. In the next section, we’ll go through a step-by-step guide to ensure your cake turns out perfect every time.
Step-by-Step Instructions
How to Make Pumpkin Dump Cake
Since you have gathered all your ingredients, it’s now time to combine them. One of the best things about this pumpkin dump cake recipe is how easy it is to make. There’s no need for a stand mixer or complicated techniques—just layer, bake, and enjoy. Follow these step-by-step instructions to ensure your cake comes out perfectly every time.
Step 1: Prepare Your Baking Dish and Oven
- Preheat your oven to 350°F (175°C).
- Gently coat a 9×13-inch baking dish with butter or a nonstick cooking spray. This prevents sticking and makes cleanup easier.
Step 2: Make the Pumpkin Mixture
- In a large mixing bowl, whisk together the following ingredients until smooth:
- Pumpkin purée (1 can, 15 oz)
- Evaporated milk (1 can, 12 oz)
- Eggs (3)
- Granulated sugar (1 cup)
- Pumpkin pie spice (2 teaspoons)
- Vanilla extract (1 teaspoon)
- Evenly distribute the pumpkin mixture into the baking dish. that has been prepared. This will form the custard-like base of your cake.
Step 3: Add the Cake Mix Layer
- Open your box of yellow cake mix (15 oz) and evenly sprinkle it over the pumpkin mixture. Do not mix—this step is essential to achieve the signature layered texture of dump cake.
- If you want a slightly spiced flavor, you can use a spice cake mix instead of yellow cake mix.
Step 4: Add Butter for a Golden, Crisp Topping
- Melt 1 cup of butter and drizzle it evenly over the dry cake mix. This allows the top to become golden brown and slightly crispy as it bakes.
- For an extra crunchy texture, sprinkle ½ cup of chopped pecans or walnuts over the top.
Pro Tip: If you want a crispier top, try thinly slicing cold butter and laying the pieces over the cake mix instead of melting it.
Step 5: Bake to Perfection
- Place the baking dish in the preheated oven (350°F) and bake for 50–55 minutes, or until the top is golden brown and the edges are bubbling.
- To check for doneness:
- The cake should be firm around the edges and slightly set in the center.
- A toothpick inserted near the edges should come out mostly clean.
- The top should be crispy and golden, while the bottom remains soft and custardy.
Note: The cake will continue to set as it cools, so don’t overbake it.
Step 6: Let It Cool and Serve
- Remove the cake from the oven and let it cool for at least 15–20 minutes before serving. This allows the layers to set properly.
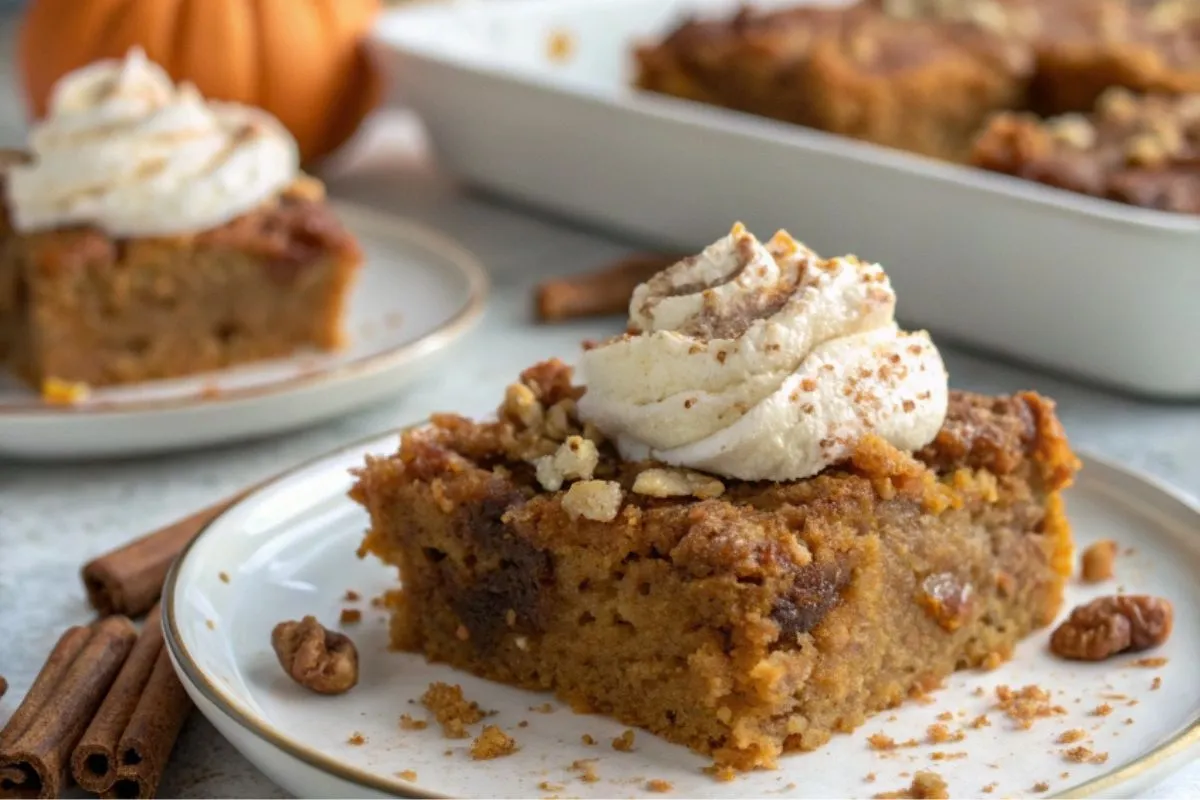
- Serve warm for the best flavor. You can also add toppings to enhance the taste:
- Whipped cream for a light and airy contrast.
- Vanilla ice cream for a creamy, cool pairing.
- Caramel drizzle for extra sweetness.
- Toasted pecans for a nutty crunch.
Storage Tip: If you have leftovers, store them in an airtight container in the refrigerator for up to 5 days.
Now that you’ve successfully baked your pumpkin dump cake, let’s move on to some expert tips and tricks to make it even better!
Tips for the Best Pumpkin Dump Cake
Making a pumpkin dump cake is already simple, but a few expert tips can take it to the next level. Whether you’re aiming for a crispier topping, a richer flavor, or a perfectly balanced texture, these tips will help you get the best results every time.
1. Use Cold Butter for a Crispier Topping
- Instead of melting the butter and drizzling it over the cake mix, try slicing cold butter into thin pieces and placing them evenly across the top.
- This method helps the butter distribute more evenly, creating a flaky, crisp texture instead of a softer topping.
- If using this technique, ensure the butter slices cover most of the surface to prevent dry spots.
2. Make It Extra Flavorful with Spice Cake Mix
- While yellow cake mix is the classic choice, switching to spice cake mix adds extra warmth and depth to the dessert.
- Spice cake mix contains cinnamon, nutmeg, and cloves, which enhance the pumpkin flavor even more.
- If using yellow cake mix, consider adding ½ teaspoon of cinnamon or a dash of nutmeg to the dry mix before layering.
3. Don’t Overmix—Layer the Ingredients Properly
- Dump cakes should never be mixed—each ingredient should remain in its own layer.
- Mixing the cake mix into the pumpkin base will ruin the signature texture and make it too dense or gummy.
- Simply sprinkle the cake mix over the pumpkin layer and drizzle butter on top for the perfect balance.
4. Add a Cream Cheese Swirl for Extra Richness
- If you love the combination of pumpkin and cream cheese, try swirling in a sweetened cream cheese mixture before adding the cake mix.
- How to do it:
- Beat 4 ounces of softened cream cheese with ¼ cup sugar and 1 egg.
- Drop spoonfuls of this mixture over the pumpkin layer and swirl with a knife.
- Proceed with the recipe as usual.
5. Adjust the Sweetness to Your Preference
- Some people find traditional dump cakes a little too sweet. If you prefer a more balanced flavor:
- Reduce the granulated sugar in the pumpkin layer from 1 cup to ¾ cup.
- Use brown sugar instead of white sugar for a slightly caramelized flavor.
- Opt for unsweetened whipped cream as a topping to balance the sweetness.
6. Give It a Crunchy Twist with Toppings
- While the classic recipe is delicious as is, adding a crunchy element takes it up a notch. Try:
- Chopped pecans or walnuts for a nutty crunch.
- Toffee bits for a caramelized texture.
- Crushed graham crackers for a cookie-like topping.
7. Serve It Warm for the Best Taste
- This dessert tastes best when served warm, as the pumpkin layer remains creamy, and the topping stays crisp.
- If making ahead, simply reheat in a 300°F oven for 10–15 minutes before serving.
- Individual servings can be microwaved for 30 seconds to bring back the freshly baked taste.
8. Store and Freeze Properly
- Refrigeration:Keep leftovers in a sealed container in the refrigerator for up to 5 days.
- Freezing: Securely cover the cake with plastic wrap and store it in the freezer for up to 3 months.
- Reheating: Thaw overnight in the fridge, then warm in the oven at 300°F until heated through.
Now that you have all the best tips for making pumpkin dump cake, let’s proceed to how to serve and store it for optimal enjoyment.
Serving and Storage
Now that your pumpkin dump cake is baked to perfection, it’s time to enjoy it! Whether you’re serving it fresh out of the oven or storing it for later, these tips will help you get the best flavor and texture every time.
How to Serve Pumpkin Dump Cake
This dessert is best served warm, allowing the pumpkin filling to remain soft and creamy while the buttery cake topping stays crisp. Here are some great ways to elevate your serving experience:
1. Serve It with the Perfect Toppings
Pumpkin dump cake is delicious on its own, but adding toppings can make it even better. Try:
- Whipped Cream – Light and airy, it balances the richness of the pumpkin.
- Vanilla Ice Cream – A cold, creamy contrast to the warm cake.
- Caramel Sauce – Adds a sweet, buttery finish.
- Toasted Pecans or Walnuts – Provides a crunchy texture.
- Powdered Sugar – A simple dusting enhances the presentation.
2. Pairing Suggestions
If you’re serving this cake at a holiday gathering or family dinner, pair it with:
- Hot Coffee or Pumpkin Spice Latte – The warm spices complement each other.
- Spiced Apple Cider – A cozy, fall-inspired pairing.
- Chai Tea – The cinnamon and cardamom enhance the flavors of the cake.
How to Store Pumpkin Dump Cake
1. Refrigeration
- After the cake has fully cooled, wrap it securely with plastic wrap or place it in an airtight container.
- Keep it refrigerated for up to 5 days.
- Before serving, warm it in the microwave for 30 seconds or in a 300°F oven for 10–15 minutes.
2. Freezing for Longer Storage
If you want to make this dessert ahead of time, freezing is a great option.
- Wrap the entire baking dish tightly in plastic wrap and aluminum foil to prevent freezer burn.
- You can also cut the cake into portions and store them in freezer-safe containers.
- Freeze for up to 3 months.
3. How to Reheat Pumpkin Dump Cake
- Oven Method (Best for Crisp Texture):
- Preheat the oven to 300°F.
- Place the cake in an oven-safe dish and heat for 15 minutes or until warm.
- Microwave Method (Faster Option):
- Place a serving of cake on a microwave-safe plate.
- Heat on medium power for 30 seconds or until warmed through.
By following these serving and storage tips, you can enjoy your pumpkin dump cake fresh or make it ahead for special occasions. Now, let’s move on to some common frequently asked questions to help troubleshoot and customize your recipe.
FAQs
Making pumpkin dump cake is simple, but you might have some questions about substitutions, baking issues, or ways to enhance the recipe. Below are some of the most frequently asked questions, along with solutions to help you make the perfect dessert every time.
1. Is it possible to prepare this cake in advance?
Yes! Pumpkin dump cake is a great make-ahead dessert. You can prepare and bake it a day in advance and store it in the refrigerator. To serve, simply warm it in the oven at 300°F for 10–15 minutes or microwave individual servings for 30 seconds.
2. Can I Use Fresh Pumpkin Instead of Canned?
Absolutely! If you prefer to use fresh pumpkin puree, substitute 1 ½ cups of homemade pumpkin puree for the canned version. Make sure the puree is smooth and not too watery, as fresh pumpkin can have more moisture than canned.
3. Why is My Dump Cake Too Runny?
If your cake is too wet, it could be due to:
- Undercooking: Bake for at least 50–55 minutes or until the top is golden and set.
- Too much liquid: Make sure to use evaporated milk, not condensed milk, and avoid adding extra liquid.
- Fresh pumpkin puree: If using fresh pumpkin, strain out any excess water before mixing it with other ingredients.
4. Can I Make This Recipe Gluten-Free?
Yes! Simply use a gluten-free yellow cake mix instead of the regular one. Every other ingredient in the recipe is naturally free of gluten.
5. What’s the Best Way to Make the Topping Extra Crispy?
For a crunchier topping, try these tricks:
- Use cold butter slices instead of melted butter – this helps create a more even, crispy layer.
- Bake the cake a little longer – if the topping looks too soft, leave it in the oven for an extra 5–10 minutes.
- Broil for the last 2–3 minutes – keep a close eye to prevent burning, but this will help crisp up the top layer.
6. Can I Make This Recipe Dairy-Free?
Yes! To make a dairy-free pumpkin dump cake, use:
- Full-fat coconut milk instead of evaporated milk.
- Replace regular butter with vegan butter or coconut oil.
The texture might vary slightly, but it will remain delicious!
7. What Other Toppings Can I Use?
While whipped cream and ice cream are classic choices, here are some fun alternatives:
- Maple syrup drizzle – adds extra fall flavor.
- Chocolate chips – a sweet contrast to the spiced pumpkin.
- Toasted coconut flakes – for a tropical twist.
- Crushed graham crackers – for a cheesecake-like texture.
8. Can I Use a Different Cake Mix Flavor?
Yes! While yellow cake mix is the traditional choice, you can experiment with:
- Spice cake mix – enhances the fall flavors.
- White cake mix – for a lighter flavor.
- Butter pecan cake mix – adds a nutty, buttery taste.
9. How Do I Prevent a Soggy Bottom Layer?
- Make sure you don’t overmix the layers—the cake mix should be evenly sprinkled over the pumpkin layer, not stirred in.
- Let the cake cool for at least 15–20 minutes before serving to allow the layers to set properly.
- Use a glass or metal baking dish instead of ceramic, as they conduct heat more evenly.
With these frequently asked questions answered, you now have everything you need to create a perfect pumpkin dump cake. Let’s wrap up with some final thoughts on this easy fall dessert.
Conclusion
Why You Should Try This Easy Pumpkin Dump Cake
Pumpkin dump cake is the perfect dessert for fall—it’s easy to make, packed with warm pumpkin spice flavor, and requires minimal effort. Whether you’re hosting a family gathering, preparing for Thanksgiving, or simply craving a comforting treat, this recipe delivers a rich, custard-like pumpkin base with a buttery, golden cake topping that’s sure to impress.
Key Takeaways
- No mixing required – Just layer the ingredients and bake.
- Minimal ingredients – Most of the items are pantry staples.
- Customizable – You can adjust sweetness, add crunch, or make it gluten-free or dairy-free.
- Great for any occasion – Perfect for holidays, potlucks, or a cozy night in.
Final Tips for Success
- Use cold butter slices instead of melted butter for a crispier topping.
- Allow the cake to cool a bit before serving so the layers can properly set.
- Pair it with whipped cream, ice cream, or caramel drizzle for the best experience.
- Store leftovers properly and reheat to enjoy later.
Ready to Bake? Try It Today!
Now that you have all the information, it’s time to bake your own pumpkin dump cake! Gather your ingredients, follow the step-by-step guide, and enjoy a warm, flavorful dessert that’s perfect for the season.